Experiments with magnets interacting with other magnets
Ball Bearing Launcher
Description:
Now, here's a neat gizmo that will surely catch the attention
of anyone who sees this working. This demonstrates how magnets can be used to
increase the momentum of ball bearings in order to launch one a several inches
through the air. I first saw this as a linear
accelerator and decided to make one to experiment with.
Construction:
This is made with very few items, that cost me less than $5 to
build! All you really need are:
1) three NIB magnets, about 1/2" diameter and 1/8" thick
2) 10 steel ball bearings, about 1/2" diameter
3) a piece of aluminum angle, about 1/2" on the side, and 2' to 3' long
I got all of these at American Science & Surplus. However, most hardware stores carry the ball bearings and the aluminum angle, and the NIB magnets can be purchased from several of the suppliers I have listed. If possible, the ball bearings should be just a little larger in diameter than the ball bearings.
Additional stuff you will need are some ty-raps and double-sided tape to help hold the magnets in place, and something to hold the aluminum angle rail.
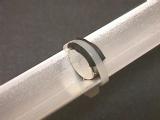
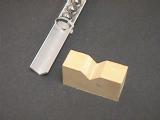
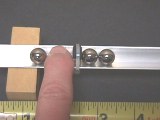
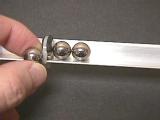
First, mount a magnet onto the aluminum rail. I did this by putting a piece of double-sided tape around the edge of the magnet, put a little foam on top, and placed it about 2.5" from the end of the angle. I then ty-rapped it to hold it in place. I also made some "V" notches in two blocks of wood to use as a holder for the rail. Instead of using the blocks, you could also use a lump of clay as a holder. Then, I raised one end of the aluminum rail up by about 4" by placing some books under the right hand end to make it into a launching rail as shown here.

Demonstration:
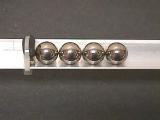
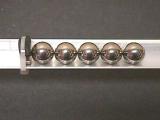
Next, do some experimenting to see how this works under various conditions. For example, I first placed two ball bearings onto the right hand side of the magnet, and allowed one ball bearing to be attracted to the magnet from a fixed distance away on the left hand side, and measured how far the last ball bearing on the right would be launched. Then I changed the number of balls on the right hand side to one, three, four and five and repeated the experiment. Which set-up do you think would launch the ball the farthest?
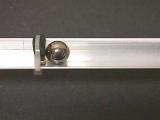
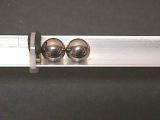
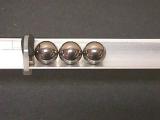
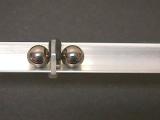
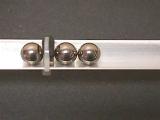
When I removed my finger as shown above, the one ball bearing on the left would be pulled toward the magnet, hit it, stick to it, and its momentum would be great enough to transfer through the balls and the magnet and launch the last ball bearing on the right hand side. (similar to "Newton's Cradle") If I started with two balls on the right, I would end up with one ball on each side of the magnet. If I started with three balls on the right, I would end up with one ball on the left and two on the right, as shown above.
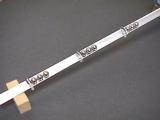
Then, I made a multiple stage launcher, by fastening three magnets to the aluminum rail. The second magnet is placed 4" from the first one, and oriented so that the poles are facing the same direction - in other words, the magnets are attracted to each other. It is held in place the same way using the tape, foam and ty-rap. The third magnet is also placed 4" from the second one, and oriented the same way and fastened the same way. You should now have something like this:
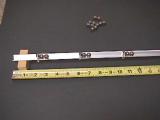
Again, I would start the process with two balls on the right hand side of each magnet and measure how far the last ball on the right would be launched. I tried several combinations of number of balls on each magnet, and measured the distance of the launched ball. Here's a table of my experimental results. The rail was 4" higher on the right hand side than the left hand side, and the length of the rail was 23", so the sine of it's angle = 4/23 = 0.174, so the angle is about 10degrees (using the arcsine(0.174) function).
| Test number | # of balls on magnet 1 | # of balls on magnet 2 | # of balls on magnet 3 | distance launched from end of rail, inches |
| 1 | 0 | 0 | 1 | 0 |
| 2 | 0 | 0 | 2 | 10.5 |
| 3 | 0 | 0 | 3 | 12 |
| 4 | 0 | 0 | 4 | 12 |
| 5 | 0 | 0 | 5 | 12 |
| 6 | 0 | 0 | 6 | 11 |
| 7 | 0 | 2 | 4 | 19 |
| 8 | 0 | 2 | 3 | 20 |
| 9 | 0 | 3 | 2 | 20 |
| 10 | 0 | 4 | 2 | 20 |
| 11 | 0 | 3 | 3 | 22 |
| 12 | 2 | 2 | 2 | 24 |
| 13 | 3 | 3 | 3 | 24.5 |
| 14 | 4 | 4 | 4 | 25 |
As you can see in test #1, when there is only one ball on the right hand side of the magnet, it will not be knocked off by the ball attracted to it from the left. You will want to try some other combinations of number of balls on each magnet, as well as different launch angles, and even different distances between the magnets! There are lots of things to try. Be sure to always keep the starting ball the same distance away from the magnet in order to have a control in your experiment. You may find that with a steep launch angle, the distance of the starting ball may need to be closer in order to be attracted and accelerated toward the magnet.
One note, since the balls really stick to the magnets, I found the best way to pull the balls off of the magnets is to slide them off sideways. When I tried to pull them off directly, the magnet would tend to be pulled out from under the ty-rap, making it a problem to fix each time I wanted to set up for an experimental run.
Conclusions:
This demonstrates how magnets can be used to increase the momentum of a steel ball bearing, from stage to stage, so that the last stage would have enough momentum to force the last ball away from the attraction it has to its magnet, and send it flying through the air.
Now, this in no way demonstrates the recovery of free
energy! Each time you perform this experiment, you do the following:
remove the balls stuck on the left hand side of the magnets
place the desired number of balls on the right hand side of
the magnets
hold the starting ball away from the first magnet
release the starting ball and watch the last ball fly through
the air
Each time, you put more energy into the system that what you get out. Heat energy is lost from the collisions that occur between the balls and the magnets, sound energy is lost when the balls and magnets collide, energy is required to pull the ball from the magnet to set up the experiment, etc. This is very similar to setting the spring in a mouse trap, and have it trip, causing it to launch a ball through the air like a medieval catapult. You put energy in and get some of it back out.
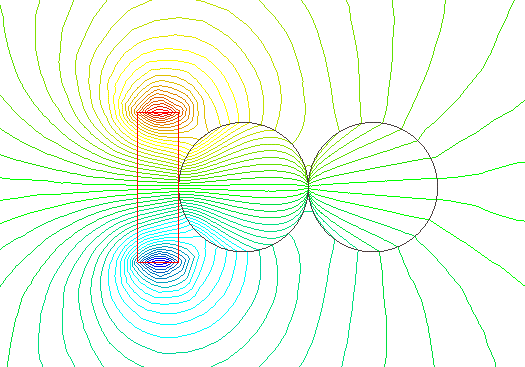
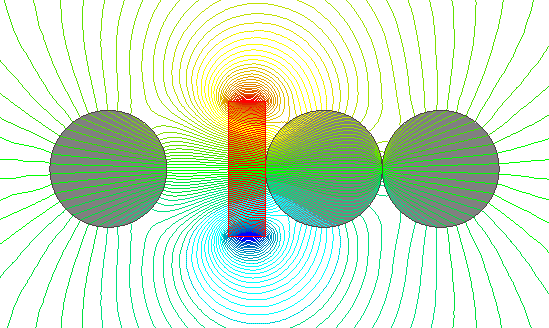
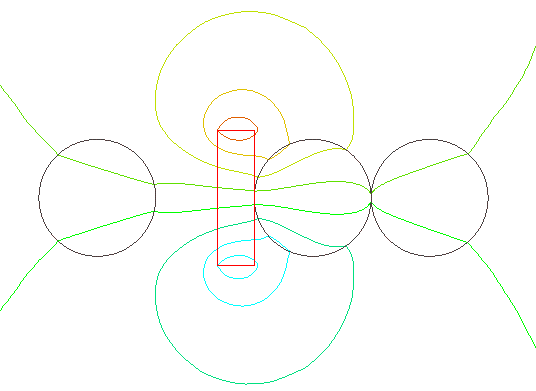
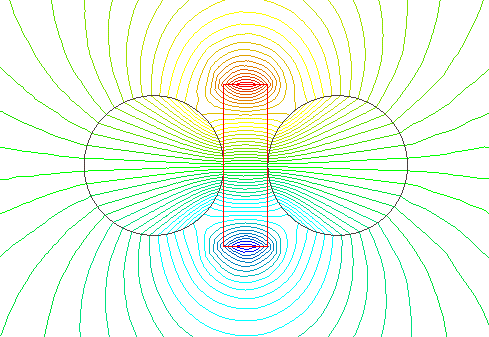
Using the FREE Maxwell program (drop me a note if you want a copy of this), I plotted what the magnetic fields looked like under a few conditions. This is a great tool to help you see what's going on and better understand how designs can be improved or optimized. The conditions are where it is set up with two balls on the right hand side, where the starter ball comes along (three diagrams showing lots of field lines, very few field lines so you can see how they are complete curves, and the magnetic field strengths), and where the finish is with one ball on each side of the magnet.